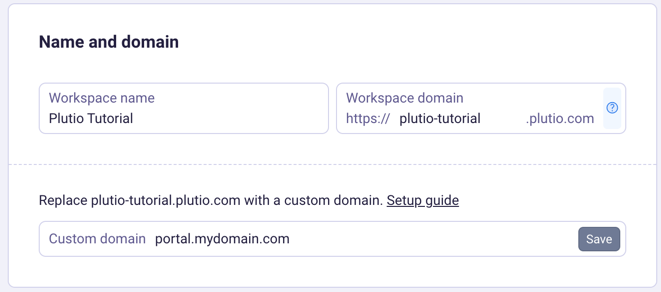
Using a custom domain allows you to replace the Plutio default URL with your own branded domain (e.g., portal.yourcompany.com).
Step 1: Log Into Your Domain Provider
Open your domain registrar’s website (e.g., GoDaddy, Namecheap, Google Domains, Cloudflare, etc.).
Sign in to your account dashboard.
Locate your domain management panel or DNS settings.
Step 2: Access the DNS Management Section
Find the section labeled DNS Settings, DNS Records, or Name Server Management.
Look for an option to Add a New Record or Manage DNS.
Step 3: Add a New CNAME Record
Click on Add Record or Create New Record.
Select CNAME as the record type.
Fill in the following details:
Host/Name | Value/Target | TTL (Time to Live) |
Enter the subdomain you want to use (e.g., portal if your custom domain is portal.yourcompany.com). | Enter your workspace URL as the destination domain (your-business.plutio.com) | Set to Automatic or 3600 seconds (1 hour) for default settings |
Click Save or Apply Changes to confirm the new record.
Step 4: Verify and Test the CNAME Record
Wait for the DNS changes to propagate (this can take anywhere from a few minutes to 24 hours).
Use a DNS checker like https://www.whatsmydns.net to verify that your CNAME record has been updated.
Step 5: Connect the Custom Domain to Plutio

Go to Settings > Workspace details, and find the Custom Domain field.
Enter your subdomain (e.g., portal.yourcompany.com) you created above.
Click Save in Plutio to complete the setup.
 Once verified, your clients and team will access Plutio through your custom domain!