Pages in Plutio are flexible dashboards you can fully customize with widgets — perfect for tracking projects, tasks, time, invoices, and more, all in one place.
Step 1: Navigate to the Pages Area
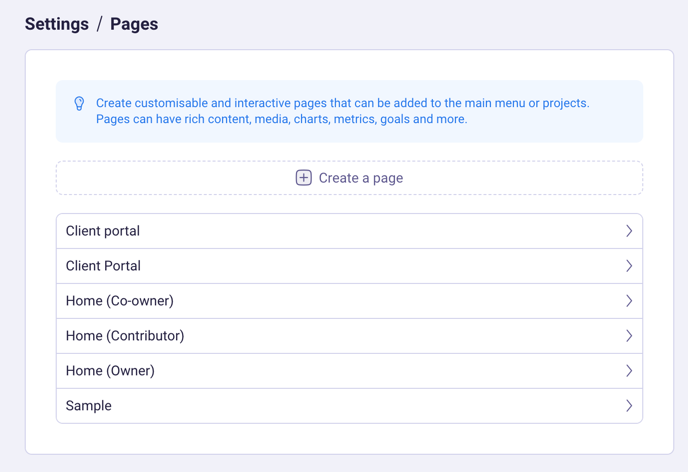
From the productivity tray, click on “Settings”, and click “Pages”.
You’ll see a list of existing pages:
Step 2: Create a New Page
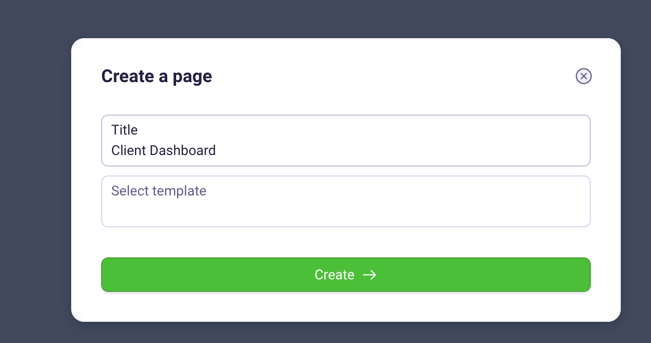
Click the “+ Create a page” button.
Give your page a name (e.g. “Client Dashboard” or “Team Overview”).
[Optional] You can also start from a template.
Click “Create”
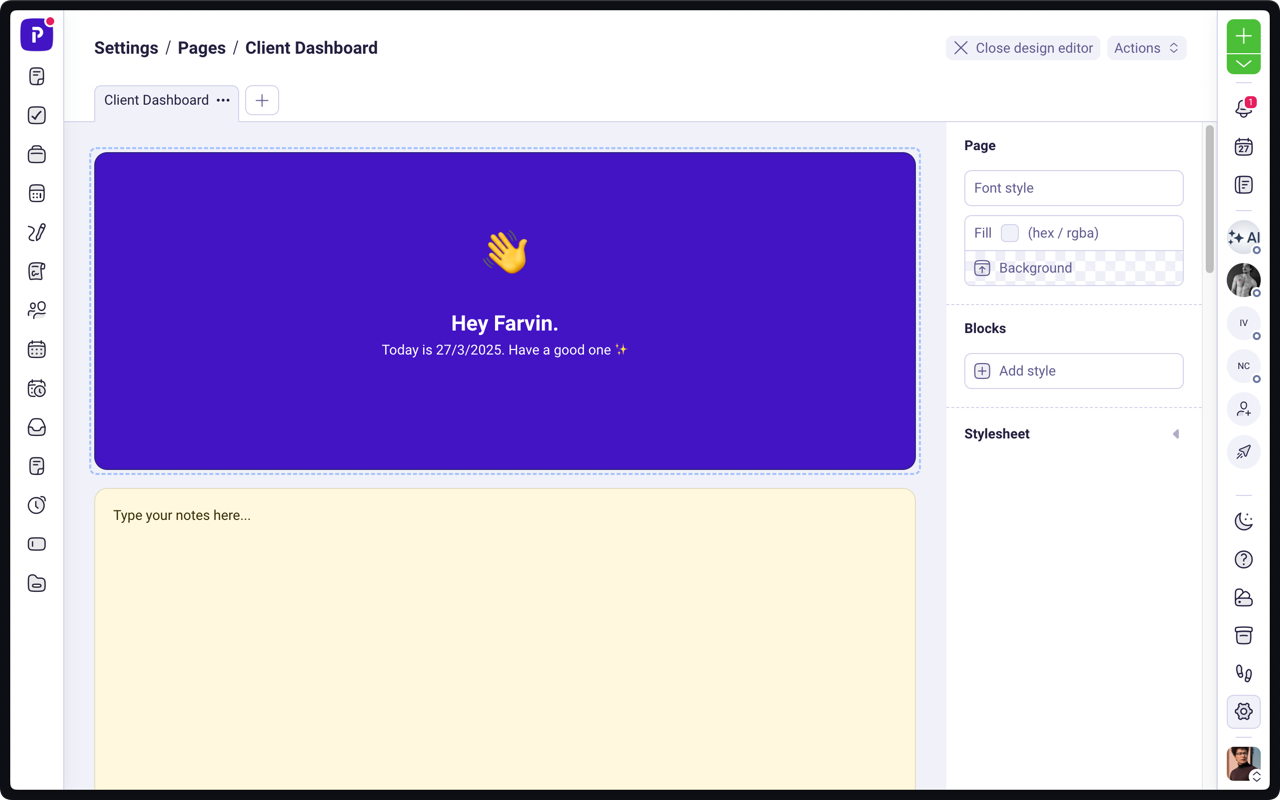
Step 3: Customize Your Page with Widgets
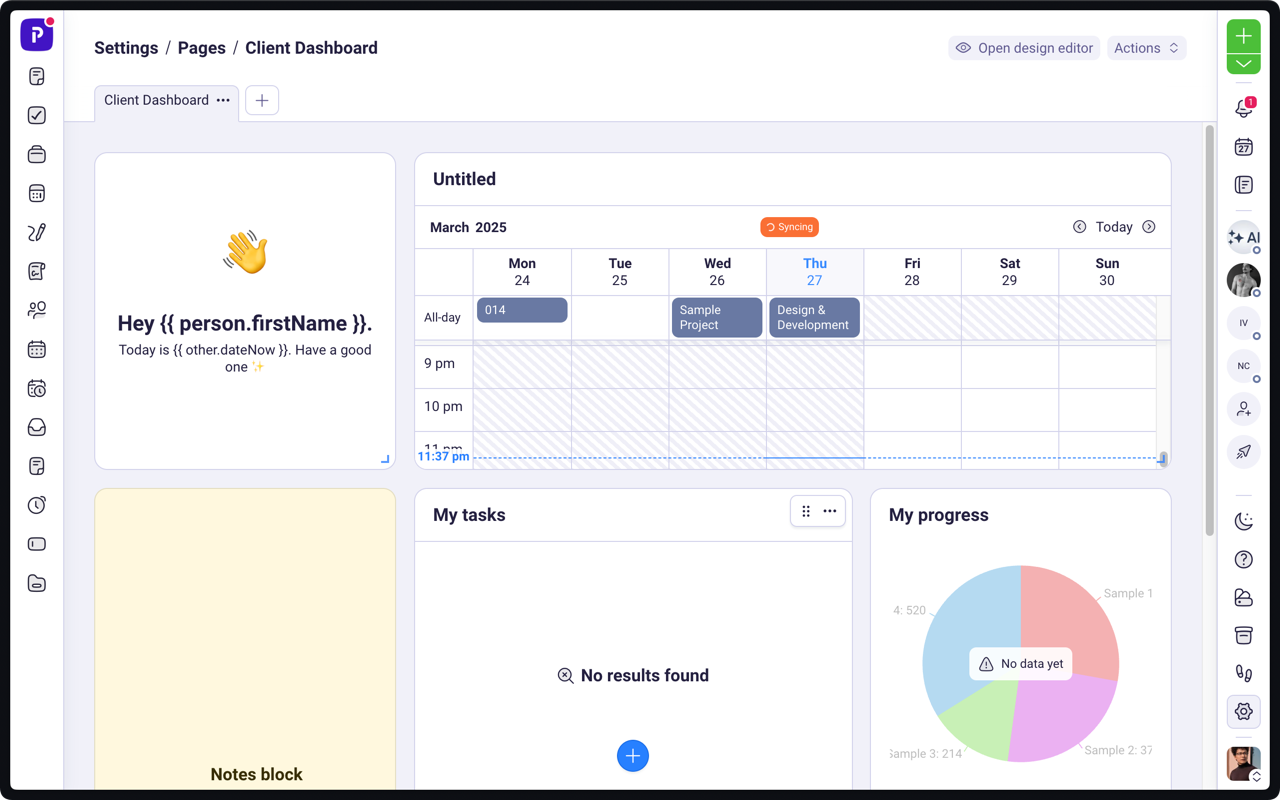
Your new page opens in edit mode with several preconfigured widgets.
Click the blue “+” button at the bottom to add a new widget.
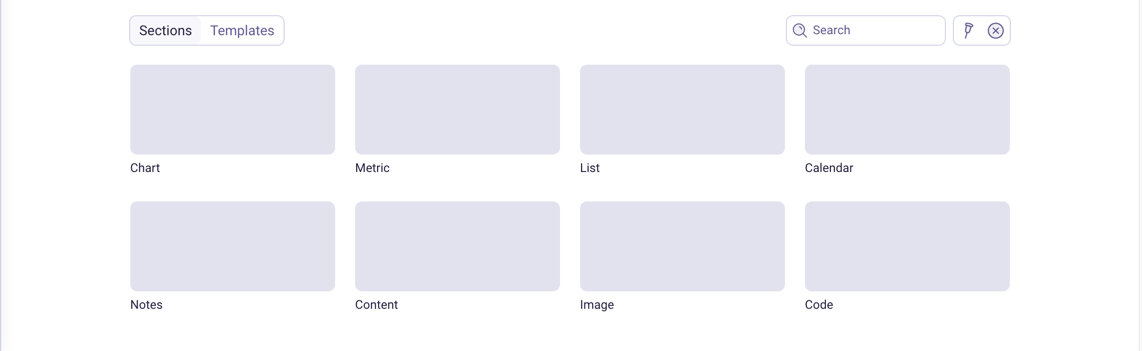
Choose from a variety of widget types:
Step 4: Arrange and Resize Widgets
You can:
Drag widgets to reposition them on the page.
Use the resize handle at the corner of each widget to adjust its size.
You can stack or spread widgets to create a layout that works for you.
Step 5: Customize the Page further (Optional)
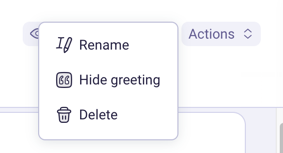
Click the Actions menu in the top-right corner of your page to:
Rename the page
Hide the default greeting
Delete the page
Click the “Open design editor” to:
Customize the colors
Change the font
Add custom CSS
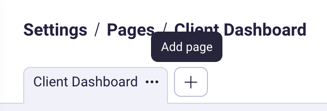
Click the + tab icon to add a new page to the Dashboard you create. You can have as many tabs as you want.
You can add the pages to:
Your, or other users’ main menu
A project menu