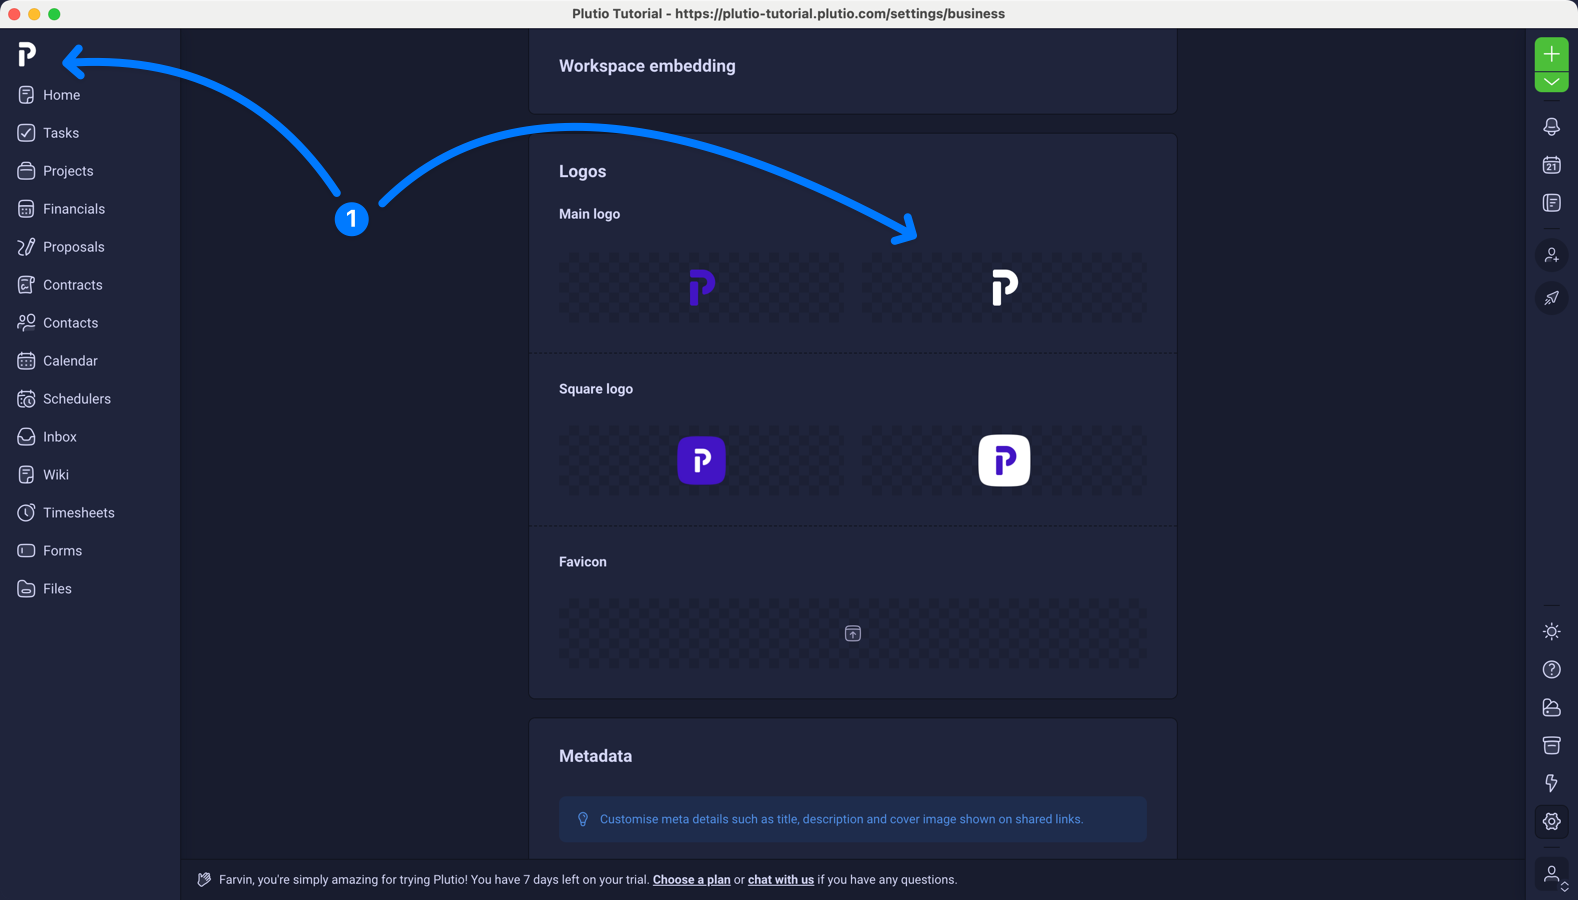
You can rename your workspace, change your workspace subdomain, and add your workspace logos from the Settings > Workspace details page.

Your workspace name
Your workspace subdomain (e.g., https://your-business.plutio.com)
Custom domain to replace https://your-business.plutio.com with a subdomain you own, like https://workspace.your-domain.com.
Upload your logos. More details below.

Your main app logos in light and dark mode
Your square logos that are used in the proposals, invoices, and contracts sent to your client.
Browser favicon
Let's upload them and see what it looks like:

Changing to dark mode:

This logo will be used in the main menu

The "square logo" will be used if you minimize the main menu
To set up your payment methods, head over to the Settings > Integrations page. Under the Workspace Integrations section, you will see four types of payment methods:

Bank account: this method is used for manual transfers to your bank. You can use this when your client is "old-fashioned" and chooses to pay you manually. It can be customized, and the details/fields you add are not necessarily your bank details. You can also add your Wise, Payoneer, or other payment details. You can add an unlimited number of custom payment methods. Remember that this is not directly integrated with your bank (or others).
PayPal: this method will connect your PayPal email address to receive payments.
Square: this method will connect your Square account to accept card payments. Learn more.
Stripe: this method will connect your Stripe account to accept card payments. Learn more.
Once you have them connected, let's add them to your invoice!
If you connect or add your payment methods correctly, you will see them listed here:

Plutio supports email sending for:
Invitation to your workspace
Proposal sending
Invoice sending and invoice reminders
Contract sending
Notifications and communication
In addition, any emails sent out via Plutio can be replied to, and the replies will arrive at your main email address (the one you use to log in to your workspace). By default, Plutio sends all emails from noreply@email.plutio.com.
However, receiving emails unrelated to or outside of your Plutio workspace is not possible as Plutio is not an email tool.
 To set up email sending using your email address, white label add-on ($9/mo) is required.
To customize the default messages that your clients receive, head over to the Settings > General settings page. You can customize default messages for:
Invitation
Proposal
Invoice
The default messages will be used instead if these fields are left empty.

BEFORE
You can write your default messages, so whenever you send out an invitation, a proposal, or an invoice, these messages will replace the default ones.
Here is an example of customized default messages:

AFTER
Take note:
 You cannot change the intro and footer line in the emails sent from your workspace
 You cannot customize email notifications
Connect your Google Calendar to sync events. This is a two-way sync, and all events created within your workspace calendar will appear on your Google Calendar and vice versa.
You can also import your workspace calendar into other calendar apps like Apple Calendar, Fantastical, or Outlook Calendar. Copy the URL and enter it in your calendar app of choice to "subscribe" to your workspace calendar.

Note: only Google Calendar is supported for two-way sync.
Click on Schedulers from the main menu.
Click the green Create Scheduler button and give it a title.
Choose a template or click "Create Scheduler" to save it as a template.
On the Scheduler editor page, set durations, buffers, limits, payment options, custom fields, and localization settings.
Customize the appearance by clicking the Designer tab and modifying colors.
Set up availability by clicking your profile icon in the side tray, then selecting My Availability.
Adjust the time slots to reflect your preferred availability.
Update the availability to save the changes.
If needed, add time slots outside the default availability by clicking on the Availability tab and double-clicking on a date to add a time range.
Use the Limits options to prevent last-minute bookings or bookings too far in the future.
Preview the scheduler to verify the setup.
Connect your Stripe account if you want to collect payments.
Use the form builder to add inputs like location, website URL, and optional fields.
Reorder the sections as desired.
Specify whether the email field is required or optional.
Set the location to either a physical address or a direct online meeting link.
Integrate with Google Meet or Zoom for automatic meeting links.
Test the scheduler by changing the status to active and creating a test booking.
Confirm the booking and check the date, time, and meeting link.
Save the scheduler as a template once everything is set up.
This is where you set your default currency, language, timezone, and formats. There are two types of localization: workspace and personal. Head over to the Settings > Localization page to customize your localization.
The default localization settings used whenever you share things publicly/with someone without an account. This setting will be inherited in your proposals, invoices, contracts, and their associated templates by default.

Your localization that only applies and visible to you.
